On This Page:
Editing & Deleting an Existing Customer
- Customer Details
- Main Address
- Customer Addresses
- Tax Applies
- Account Frozen
- Default Location
- Discount Group
- Default Terms
- Users
- Comments
- Watch out Notes
- Allowed Item Categories
- Show Customers Sales
- Show Customers Activity Notes
- Delete
Inviting Customers to SalesIn B2B
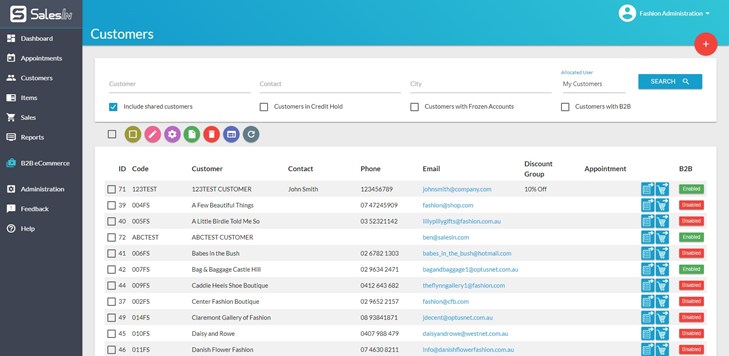
Customers
From here, you can filter and search for customers, as well as add them.
Adding a New Customer
- To add a new customer, click the "+" button
- You will see the customer details screen (explained below).
Editing & Deleting an Existing Customer
- To change a customers details or remove them, you must first click on the customer.
- A new tab in your browser will be shown, with the customer’s details in it (explained below).
Customer Details
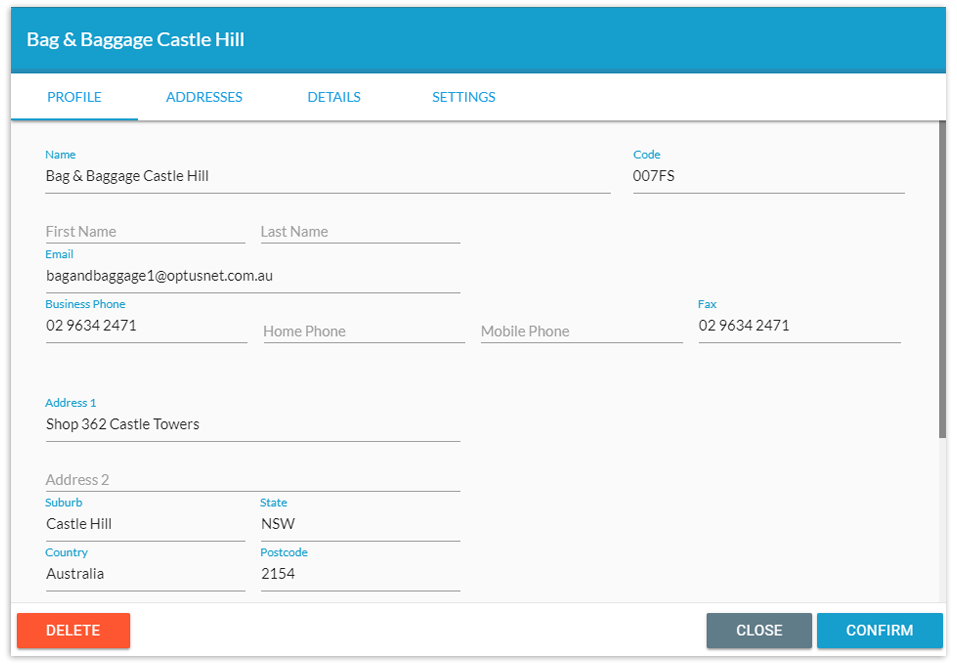
From here, the following options are available;
- Customer Details (name) – This first field is for the customer name. If no value exists in this field, you will not be able to save the customer.
- Main Address – These fields will be used for delivery and billing addresses on new sales, by default.
- Customer Addresses – You can add further billing and delivery addresses if required and these will overwrite the main address for new sales.
- Account Frozen – If this is checked, sales reps using the SalesIn app will not be able to create new sales for this customer.
- Default Location – This indicates the Item Location that should be used by default when a new sale is created for this customer.
- Discount Group – Put a value in here to allocate a customer to a Group. Discount Groups can be used when defining pricing rules/discounts.
- Default Terms – This indicates the default payment terms for sales created for the customer.
- Users – Use this to allocate the customer to one or more users.
- Comments – Enter any comments about this customer here.
- Watch out Notes – Watch out Notes are seen by sales reps when the customer is used for a new sale.
- Allowed Item Categories – Tick the item categories that you want to make available for customers to buy from you. If item categories are unticked, the items within these categories will not show up when a new sale is created. This also applies for the B2B portal.
- Show Customers Sales* – Opens a new tab, navigating to the Sales page and filters on sales for this customer.
- Show Customers Activity Notes* – Opens a new tab, navigating to the Activity Notes page, and filters on activity notes for this customer.
- Delete* – Removes this customer from SalesIn.
When you have finished with the customer details, click Confirm (bottom-right) to save it and close this window.
**Note**
- If you cannot see some of the options described here, it likely means your user account does not have permission to use these areas.
- If you have Custom Fields enabled for Customers, these will also show up on this screen.
- Another reason you may not be able to action some of these options is because they have been deactivated by your accounting system. These can sometimes be activated with limitations. Contact us to find out more about this.
Inviting Customers to SalesIn B2B
The Customers page contains all of the customers that your user account has permission to see. From here, you can search for a customer and invite them to use SalesIn B2B, or change their account details.

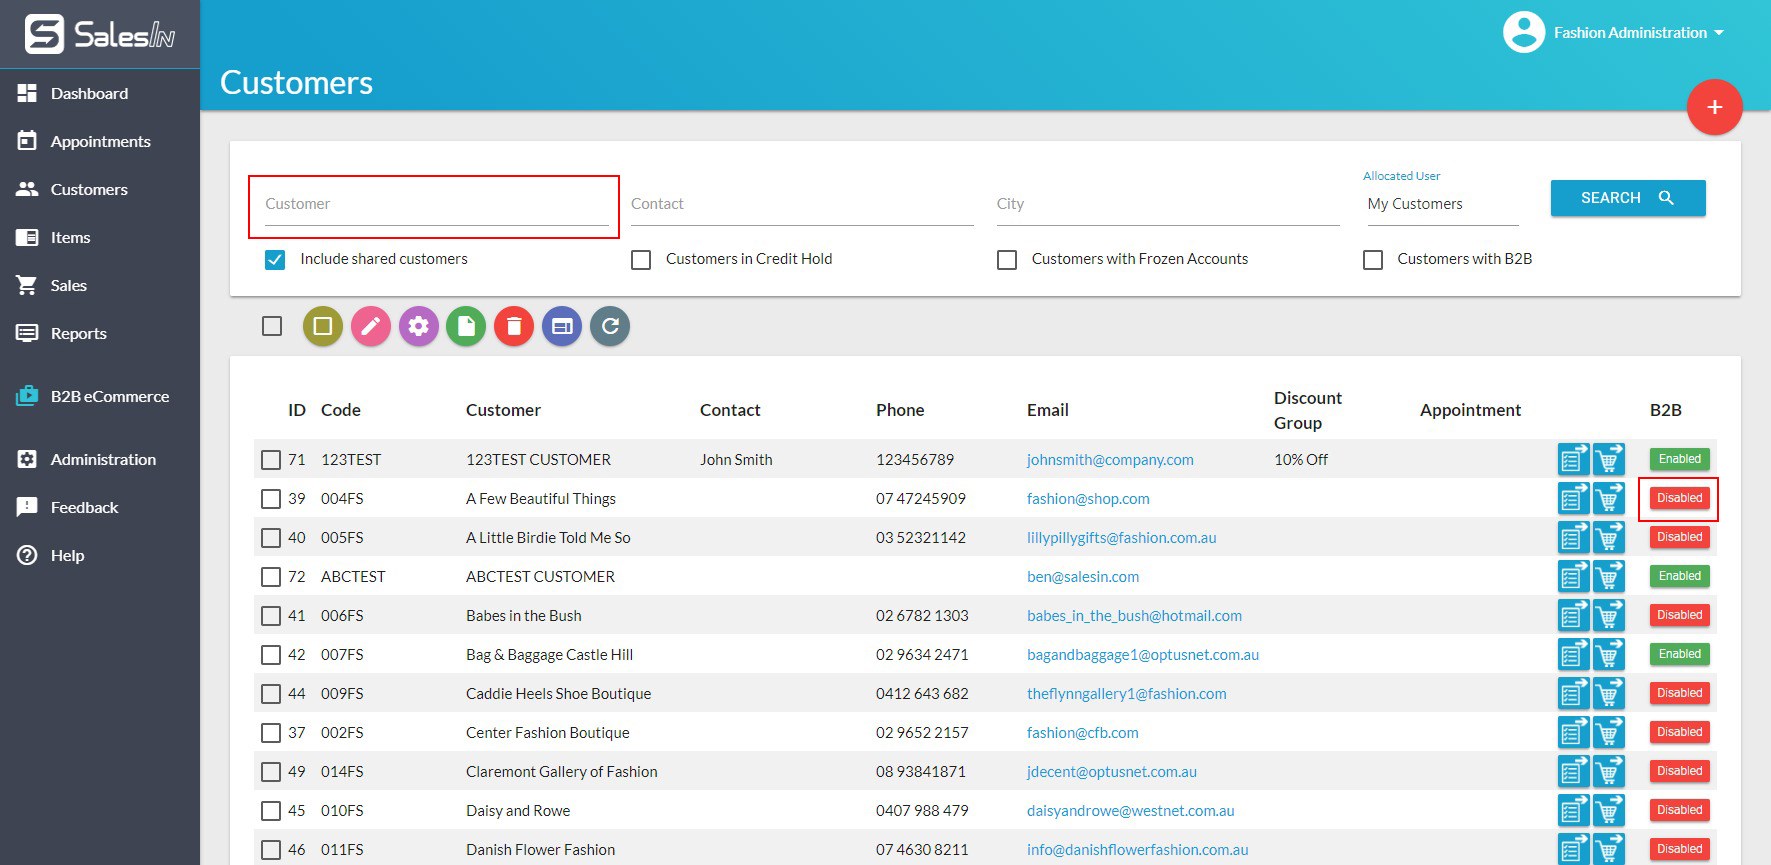
Click on the B2B column to show the options available.
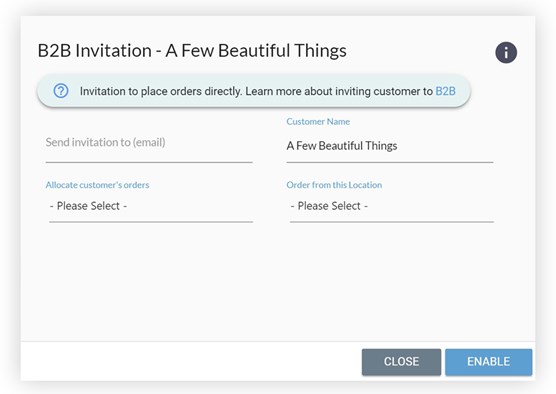
-
Send invitation to (email) – This is your customer’s email address. This will become their username and the invitation email to use SalesIn B2B will be sent here. This must be unique and not used by another customer or SalesIn user.
- Allocate customer’s orders – Nominate a SalesIn user that will become the assigned user for any order created by your customer.
- Order from this Location – This option is only shown for companies with multiple item locations defined. For simplicity, customers using SalesIn B2B can only order stock from a single item location and this needs to be defined here.
All above fields are compulsory. Once you are happy with the options, you can click Enable and the invitation will be sent.
Invitation email example:
The invitation email is constructed using your company details and a few other variables. Here’s what it looks like:
|
Dear John Smith, A user account has been created for you to log in to our Online Ordering website. Username: johnsmith@gmail.com Click here to login for the first time and set your password. Next time you need to login, you can do so from our website here: https://b2b.salesin.com/ |
The highlighted areas in the above email content are obtained from the following places:
- johnsmith@gmail.com - This is the email address you defined for the customer when inviting them to SalesIn B2B.
-
https://b2b.salesin.com/ - This is the default way for customers to login. You can change this URL on the SalesIn B2B Settings page from the left-hand menu.
- 03 9566 7600 – This is your company phone number.
- accounts@mylittleshop.com.au - This is your company email address.
- My Little Shop – This is your company name.
All company details are set under the Company Settings page, under administration from the Web Portal.