On this page:
Viewing & Changing Customer Details
Customers
The Customer List contains all of the customers that your user account has permission to see. To add, change or remove customers, open your customer list from the Main Menu, by tapping on Customers.
From here, you can scroll through your customers, as well as search for a customer by name. Additionally, you can use the advanced search option found under the Action ([↑]) button, to search customers based on Custom Fields. (If you cannot see the advanced search option, you do not have any custom fields defined.)
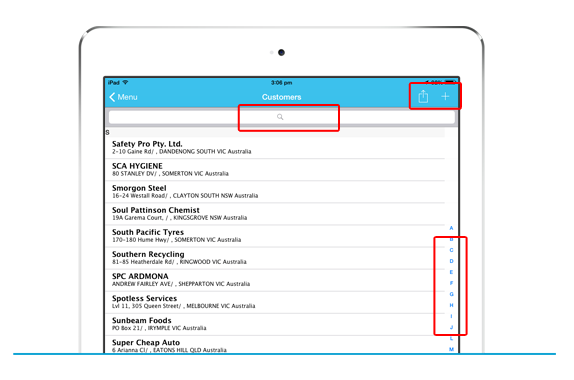
Adding a New Customer
- To add a new customer to your list, tap on the Add New (+) button up the top-right of the screen.
- You will see the customer details screen (explained below).
Viewing & Changing Customer Details
- Tap a customer in the list to bring up their details.
- You will see the customer details screen (explained below).
- If you have permission to edit customers, you can tap Edit up the top-right of the screen to make changes (tapping Done to save), otherwise, you can simply view the details.
Customer Detail Tabs
Customer details are separated into four areas/tabs, at the bottom of the screen.

Info tab – Shows the basic details of the customer, such as name, address, phone and other contact details.
- Billing Address, Customer Address, Delivery Address – used to specify various addresses for the customer. You can have multiple billing and delivery addresses, and these will be chosen automatically for the customer during a sale. If you don’t have separate billing and delivery addresses, fill out the single customer address and this will be applied for both addresses during a sale.
- Tax – This option will automatically set whether tax is applicable for sales created for this customer.
- Default Terms – Similar to the above, this will set the sales payment terms to match this customer’s payment terms by default. Once in the sale, you have the ability to change this as needed.
- Discount Group – You have the ability to assign a customer to a group for discounting and special pricing purposes. More information can be found here.
- Custom Fields – If you have customer custom fields configured, you will see them here.
- Sales, Surveys, Activity Notes – Quickly jump to these areas, filtered by this customer.
- Delete Customer – If you have permission, you can delete this Customer, otherwise this option will not be shown. Note: If you have an accounting system integrated, when the sync runs, the customer will be repopulated - you will need to remove a customer in the accounting system if you need them removed.
Comment tab – You can add general comments against this customer for internal use.
Notes tab – Similar to comments, however, these Watch out Notes will display on screen when the customer is selected for a new sale. This can be extremely useful for adding reminders for the next time you visit the customer.
Appointments tab – Shows you the Appointments scheduled for this particular customer, and allows you to manage them as needed.